| | planemechFJ's Build |  |
|
+11SingleTrack FiJiKrawl fjdarrell MadToy David B boaterspence NC FJ Driver bigdogdewey2 Speedrye FJ Derek planemechFJ 15 posters |
|
| Author | Message |
|---|
planemechFJ
SUPPORTING MEMBER


Posts : 112
Points : 4349
Join date : 2012-10-18
Location : Kernersville,NC
| Subject: planemechFJ's Build  Fri Oct 19, 2012 8:08 pm Fri Oct 19, 2012 8:08 pm | |
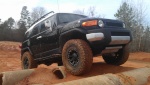
| PlanemechFJ's Build
Current Pic:
SPECS:
From the dealer:
2012 4x4 6MT in Black/Light Gray/Charcoal
Options:
17" alloys,Convenience Package, Offroad Package.
Distributer installed options:
Roof Rack, All Weather Mats, and Black Step Bar.
Mileage when purchased:
15
MODIFICATIONS/UPGRADES:
Suspension:
Front: 3" Toytec, Bilstein 5100 Coilovers
Rear: 2.5"Toytec, Springs and Bilstein Shocks
Toytec Diff Drop
Wheels and Tires:
Wheels: 17"x9" Raceline Rockcrushers 887
...........backspacing=5"
...........offset=0mm
Spacers: 1.25" Spidertrax
Tires: Bridgestone Duelers 265/65r17
BMC: performed by ASI
Electronics:
CB Radio: Uniden Pro510-XL
CB Antenna: 4' Firestik on a Boztec hinge mount with QD & Spring
AM/FM Antenna: 4' Firestik AM/FM on custom adapter mount.
Lighting:
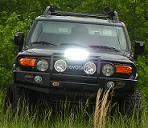
Front Bumper: Hella Black Magic 1000's, Factory mounted, OTRATTW switch
Rear Roof: Hella Micro FF's, KC Rollbar Mounts, OTRATTW switch,Wired as reverse lights or manually switched.
Exterior:
Windows: Tinted 75% Heat reduction film on windshield, 35% on two front sides. Installed by DeDona.
Blacked Out: Front wings, Rear wings,Bumpers, Door handles, Mirrors, Rear Badges using Plasti Dip.
Painted: Front Toyota Badge, Red
Roof: Wrapped in Black/Gray Snake Skin Vinyl
Stickers,Stickers and more Stickers.
Recovery Gear,Tools,and Saftey:
48" Hi-Lift x-treme, with Black handle keeper.
Offroad Base for Hi-Lift
Kobalt Brand Axe and Shovel mounted to roof rack.
15' Blue Hawk Utility Chain
2 3/8" Shackles, Northern Tool brand
Plastic Storage Bin:
Schumacher XP2260 jump starter
Medium Sized F.A.K.
Miscellaneous Additions:
Spingtail Soultions Back Pack Hook on passenger seat.
Center Console wrapped in matching Snake Skin Vinyl.
THE START: Ok I guess I will go ahead and start this. I currently don't have much to update and the"build" will be slow but it will be nice to have a place to update things as I go. 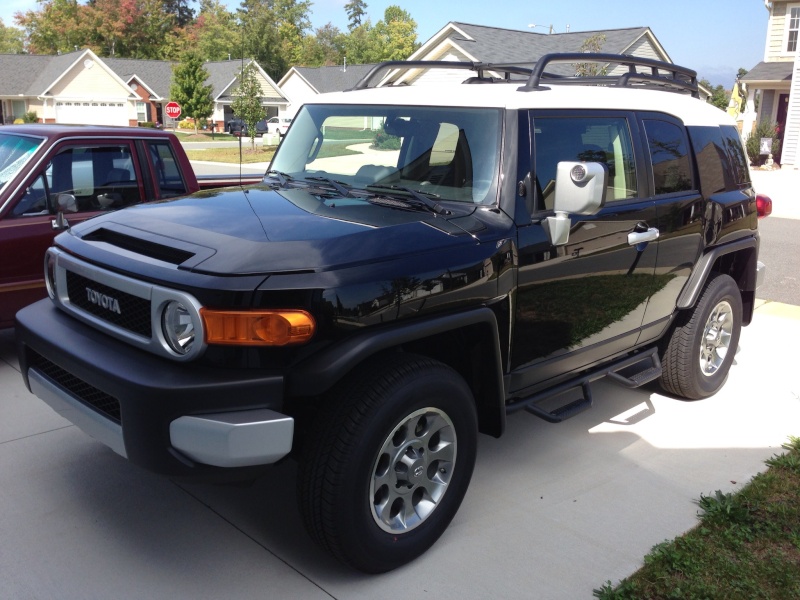 Stock Shortly after I got. Black 6MT with offroad package. 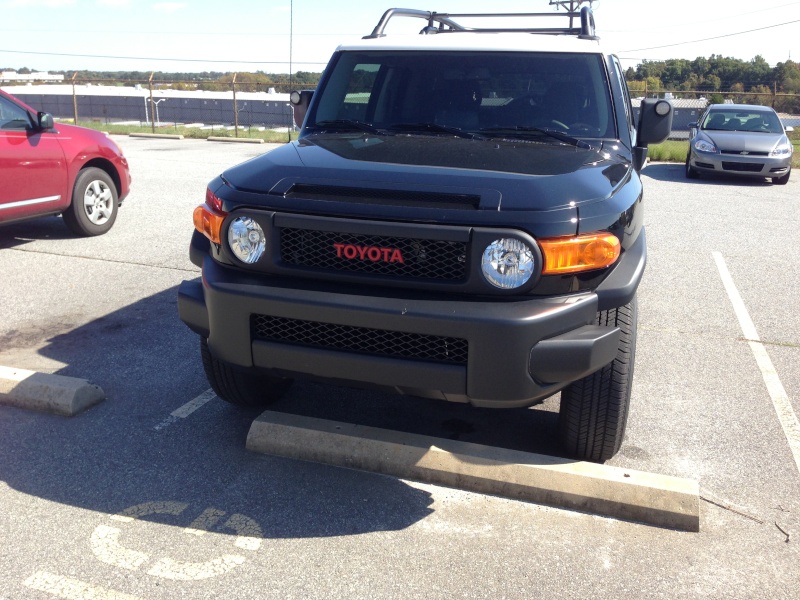 After the first minor cosmetic changes. Tint and started blacking things out and did the toyota in the grille red. Then today thanks to FJ Derek I added these. 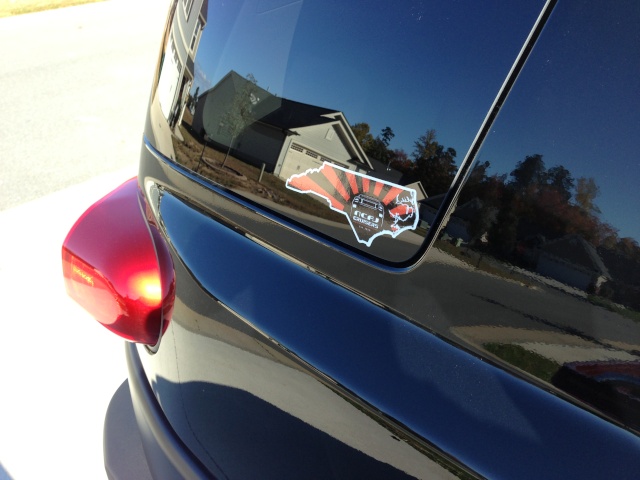 and  and found the motivation to finish my door handles and my wheels. 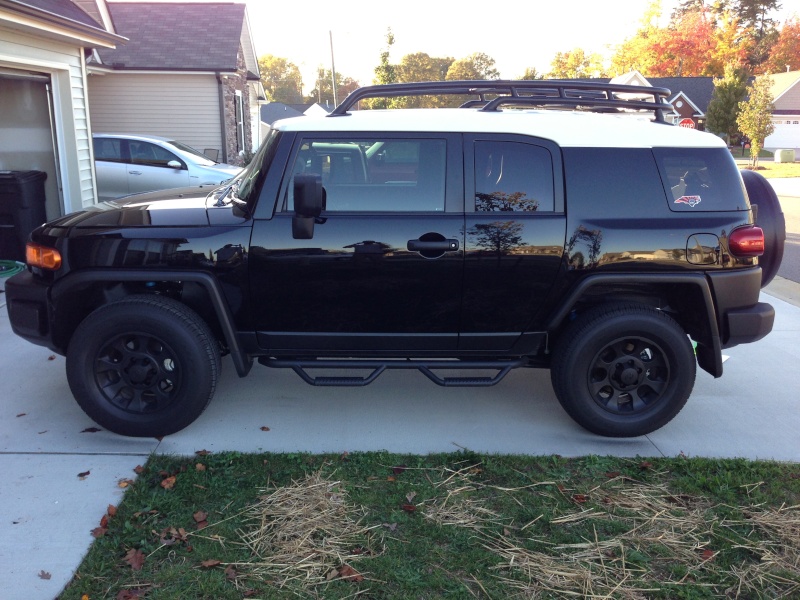   Thats it for now Hopefully will be adding some lights sometime before the end of the year.
Last edited by planemechFJ on Sat Feb 23, 2013 12:35 am; edited 9 times in total (Reason for editing : Update Spec Sheet) | |
|
| | |
FJ Derek
SUPPORTING MEMBER

Posts : 571
Points : 4921
Join date : 2012-07-12
Age : 38
Location : Greensboro
| | Subject: Re: planemechFJ's Build Fri Oct 19, 2012 8:13 pm | |
| Man you got busy when you got home didn't ya! | |
|
| | |
Speedrye
Trail Guide

Posts : 1050
Points : 5827
Join date : 2011-08-30
Location : Stokesdale, NC
| | Subject: Re: planemechFJ's Build Fri Oct 19, 2012 9:22 pm | |
| That newer style wheel looks really good in black! | |
|
| | |
bigdogdewey2
ADMINISTRATOR

Posts : 3697
Points : 8471
Join date : 2011-08-30
Age : 55
Location : High Point, NC
| | Subject: Re: planemechFJ's Build Fri Oct 19, 2012 10:35 pm | |
| i do like the "bullethole" wheels in black...now i may think about getting them powdercoated like that... | |
|
| | |
planemechFJ
SUPPORTING MEMBER
Posts : 112
Points : 4349
Join date : 2012-10-18
Location : Kernersville,NC
| | Subject: Re: planemechFJ's Build Sat Nov 03, 2012 8:13 pm | |
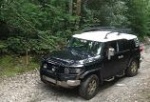
| ok so I finally had some time off work and was able to get my roof done. I used some snake skin pattern vinyl I got off ebay. the job is not perfect but for diy I'm pleased with the end result.  top and front  lefthand side  righthand side and back | |
|
| | |
Guest
Guest
| | Subject: Re: planemechFJ's Build Sat Nov 03, 2012 9:44 pm | |
| It's unique, and I hate the white roof. So I give it a thumbs up. Now you of course need a pair of matching boots to pull off the look. |
|
| | |
NC FJ Driver
Gunner

Posts : 1551
Points : 6286
Join date : 2011-05-09
Age : 61
Location : Raeford, NC
| | Subject: Re: planemechFJ's Build Sat Nov 03, 2012 10:11 pm | |
| Definately a unique look...I like it! | |
|
| | |
boaterspence
Trail Scout

Posts : 125
Points : 4466
Join date : 2012-06-28
Age : 33
Location : Greenville, NC
| | Subject: Re: planemechFJ's Build Sat Nov 03, 2012 11:43 pm | |
| I like it! It'll probably get double takes from anyone who sees it | |
|
| | |
NC FJ Driver
Gunner
Posts : 1551
Points : 6286
Join date : 2011-05-09
Age : 61
Location : Raeford, NC
| | Subject: Re: planemechFJ's Build Sun Nov 04, 2012 9:22 am | |
| How hard/easy was it to apply and how long did it take if you dont mind? | |
|
| | |
planemechFJ
SUPPORTING MEMBER
Posts : 112
Points : 4349
Join date : 2012-10-18
Location : Kernersville,NC
| | Subject: Re: planemechFJ's Build Sun Nov 04, 2012 12:24 pm | |
| - Brian wrote:
- It's unique, and I hate the white roof. So I give it a thumbs up. Now you of course need a pair of matching boots to pull off the look.
Yes Im now in the process of looking for boots or maybe a hat. lol - NC FJ Driver wrote:
- Definately a unique look...I like it!
- boaterspence606 wrote:
- I like it! It'll probably get double takes from anyone who sees it
Thanks Guys - NC FJ Driver wrote:
- How hard/easy was it to apply and how long did it take if you dont mind?
No problem, the install is easy. Definitely need at least 2 people for most of it. You need to be indoors(wind), you also need a heat gun. time is what will get you. including roof rack and rear window removal and install it took me roughly 15 hours ( 2days not straight thru )with a 2nd person for 6 hours. The only imperfections I have are due to time. Either from me rushing or after 15 hours saying ok I'm tired and willing to live with it. Any imperfection can be worked out the stuff is really forgiving. It just takes time. Also got new TLCA stickers put on both sides.  Oddly enough I got Stickers but not my membership info or packet. For those of you who see this and are members how long did it take to get your info? Also ordered all parts to do the Scuba mod. Maybe get that done next weekend. | |
|
| | |
bigdogdewey2
ADMINISTRATOR
Posts : 3697
Points : 8471
Join date : 2011-08-30
Age : 55
Location : High Point, NC
| | Subject: Re: planemechFJ's Build Sun Nov 04, 2012 2:18 pm | |
| very different!!....and i actually like it...job well done.. | |
|
| | |
Guest
Guest
| | Subject: Re: planemechFJ's Build Sun Nov 04, 2012 8:34 pm | |
| I like it too. Especially that it is matte and not shiny. Are the wheels Plastidip? |
|
| | |
David B
ADMINISTRATOR

Posts : 2677
Points : 8272
Join date : 2011-05-01
Age : 51
Location : Wake Forest, NC
| | Subject: Re: planemechFJ's Build Mon Nov 05, 2012 1:21 am | |
| | |
|
| | |
planemechFJ
SUPPORTING MEMBER
Posts : 112
Points : 4349
Join date : 2012-10-18
Location : Kernersville,NC
| | Subject: Re: planemechFJ's Build Sat Nov 10, 2012 12:29 am | |
| - bigdogdewey2 wrote:
- very different!!....and i actually like it...job well done..
Thanks - paulwardinc wrote:
- I like it too. Especially that it is matte and not shiny. Are the wheels Plastidip?
Yes wheels are plastidip. I'm curious how it will hold up over winter. - David B wrote:
- Very cool! Great job!
Thanks | |
|
| | |
planemechFJ
SUPPORTING MEMBER
Posts : 112
Points : 4349
Join date : 2012-10-18
Location : Kernersville,NC
| | Subject: Re: planemechFJ's Build Thu Dec 06, 2012 2:40 pm | |
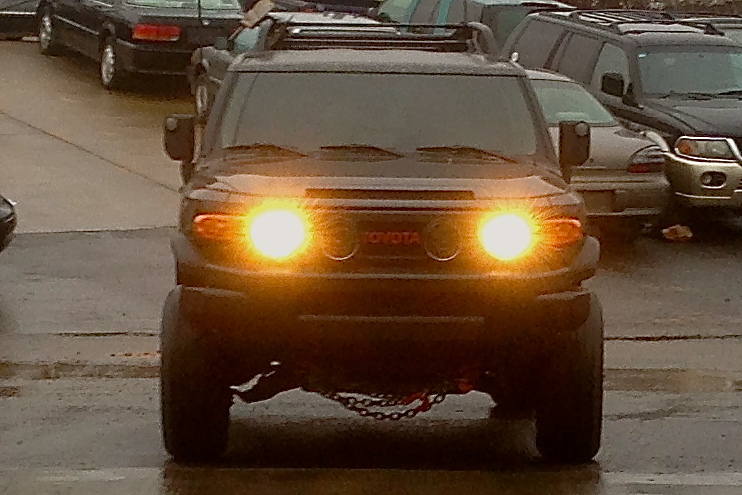
| Ok got a little update on some stuff I have been working on. First I added a chain to the front and yes it is mainly for looks.  I vinyled the center console to match the roof. Sorry for the crappy pic.  Then I started working on my CB install.  While I had the headliner down I also ran light wiring. Including wiring for this.  Here is the rear roof light switch and the offroad lights switch installed. The offroad lights switch will be for some bumper lights in the near future.  Here is a pic with the switches illuminated.  Hella MicroFF Fog lights to be used on the rear roof.  Micro FF's mounted. Lights are wired so that they can be switched manually or come on when put in reverse. Please excuse the photo quality again. Also ignore the headliner, only place that seemed safe.  I ran all the wiring thru a hole I drilled in the roof rack and thru the roof at the rack mount point. I installed connectors at this point in case the rack needs to come off in the future. Pic of the hole pre wire, which was also covered with rtv after I ran the wire.  Boztec CB Antenna mount installed with Firestick spring and QD.  Decent pic of Antenna and lights.  Uniden 510xl final install.  Another shot of the lights and Antenna.  thats all for now. and a pic of the most offroad my FJ has seen so far. lol!  I plan on blacking out some hardware on the lights and antenna, tinting lenses, and adding some bumper lights by the end of the year. After that looking into swapping the steps out for some sliders, and considering some wider wheels.  Hope everyone has a safe and happy holiday season! | |
|
| | |
FJ Derek
SUPPORTING MEMBER
Posts : 571
Points : 4921
Join date : 2012-07-12
Age : 38
Location : Greensboro
| | Subject: Re: planemechFJ's Build Thu Dec 06, 2012 2:48 pm | |
| | |
|
| | |
MadToy
SUPPORTING MEMBER
Posts : 1571
Points : 6105
Join date : 2012-02-14
Age : 55
Location : Huntersville, NC
| | Subject: Re: planemechFJ's Build Thu Dec 06, 2012 2:53 pm | |
| Very nice.
I wouldn't change those wheels. You can fit any of the larger tire sizes on those, which would work better off road than wide wheels. | |
|
| | |
fjdarrell
Tail Gunner

Posts : 743
Points : 5280
Join date : 2012-01-01
Age : 41
Location : j-ville
| | Subject: Re: planemechFJ's Build Thu Dec 06, 2012 3:30 pm | |
| where did you get that treadlighly sticker? i want one
Last edited by fjdarrell on Fri Dec 07, 2012 12:23 am; edited 1 time in total | |
|
| | |
FiJiKrawl
Trail Scout
Posts : 196
Points : 4556
Join date : 2012-06-14
Age : 41
Location : Charlotte, NC
| | Subject: Re: planemechFJ's Build Thu Dec 06, 2012 10:35 pm | |
| that looks awesome! for someone who said it was going to be a slow build, you've certainly done a lot of things here and there to completely change the look in a relatively short amount of time! | |
|
| | |
bigdogdewey2
ADMINISTRATOR
Posts : 3697
Points : 8471
Join date : 2011-08-30
Age : 55
Location : High Point, NC
| | Subject: Re: planemechFJ's Build Fri Dec 07, 2012 12:11 am | |
| nicely done..and im really digging those wheels...im just gonna have to do that to mine...i love it...nicely done on the CB too...looks good up there...
a word of caution on the hole in the roof...you may develop a leak thru that hole..rtv is great stuff however it does get stiff...and with the weather getting cooler and cooler that chance will increase...i took all my wiring thru one of the bolt holes and just omitted the bolt altogether. I used LEXEL its a clear material and not silicone...awesome stuff...hopefully you wont get a leak...but if you do ...consider it...
| |
|
| | |
planemechFJ
SUPPORTING MEMBER
Posts : 112
Points : 4349
Join date : 2012-10-18
Location : Kernersville,NC
| | Subject: Re: planemechFJ's Build Fri Dec 07, 2012 3:06 am | |
| - FJ Derek wrote:
- Nice work man!
Thanks - fjdarrell wrote:
- where did you get that treadlighly sticker? i want one
I joined as an individual member and ordered the sticker HERE - FiJiKrawl wrote:
- that looks awesome! for someone who said it was going to be a slow build, you've certainly done a lot of things here and there to completely change the look in a relatively short amount of time!
Thanks, and yes the small things do add up I guess I just meant lift,wheels, bumper and all that. I just see it in my mind way different than it is, and all of that seems a long ways away. - MadToy wrote:
- Very nice.
I wouldn't change those wheels. You can fit any of the larger tire sizes on those, which would work better off road than wide wheels. - bigdogdewey2 wrote:
- nicely done..and im really digging those wheels...im just gonna have to do that to mine...i love it...nicely done on the CB too...looks good up there...
a word of caution on the hole in the roof...you may develop a leak thru that hole..rtv is great stuff however it does get stiff...and with the weather getting cooler and cooler that chance will increase...i took all my wiring thru one of the bolt holes and just omitted the bolt altogether. I used LEXEL its a clear material and not silicone...awesome stuff...hopefully you wont get a leak...but if you do ...consider it...
Thanks, and I also like the wheels but some time in the future I would like to run wide 33's and from what I have seen all tires in this size require a min. wheel width of 8.5. I would run these wheels if I could fit the tires I wanted. Thanks for the info on the rtv. I will keep a close eye on the area. | |
|
| | |
planemechFJ
SUPPORTING MEMBER
Posts : 112
Points : 4349
Join date : 2012-10-18
Location : Kernersville,NC
| | Subject: Re: planemechFJ's Build Tue Dec 11, 2012 5:56 pm | |
| Small update. Started my Recovery Gear collection today.  I used basically the same setup seen HERE.Excuse the bird poop. Mounts and QuickFists with a cheap axe and shovel I picked up from Lowes.  View From the Top.  Also please check out my post HEREand give me some info. Thanks | |
|
| | |
bigdogdewey2
ADMINISTRATOR
Posts : 3697
Points : 8471
Join date : 2011-08-30
Age : 55
Location : High Point, NC
| | Subject: Re: planemechFJ's Build Tue Dec 11, 2012 8:22 pm | |
| looks great...the quickfists arre an awesome tool ... | |
|
| | |
planemechFJ
SUPPORTING MEMBER
Posts : 112
Points : 4349
Join date : 2012-10-18
Location : Kernersville,NC
| | Subject: Re: planemechFJ's Build Wed Dec 12, 2012 1:51 pm | |
| - bigdogdewey2 wrote:
- looks great...the quickfists arre an awesome tool ...
Thanks, and yes I was impressed with the quality of the Quickfists. They seem very sturdy. | |
|
| | |
bigdogdewey2
ADMINISTRATOR
Posts : 3697
Points : 8471
Join date : 2011-08-30
Age : 55
Location : High Point, NC
| | Subject: Re: planemechFJ's Build Wed Dec 12, 2012 6:56 pm | |
| keep an eye on the for a week or two..that rubber seems to conform..so make sure you have it laying the way you want it to lay..not just clamped... | |
|
| | |
Sponsored content
| | Subject: Re: planemechFJ's Build | |
| |
|
| | |
| | planemechFJ's Build | |
|


